

Dithering Explained: How to Prep Photos for Laser Engraving
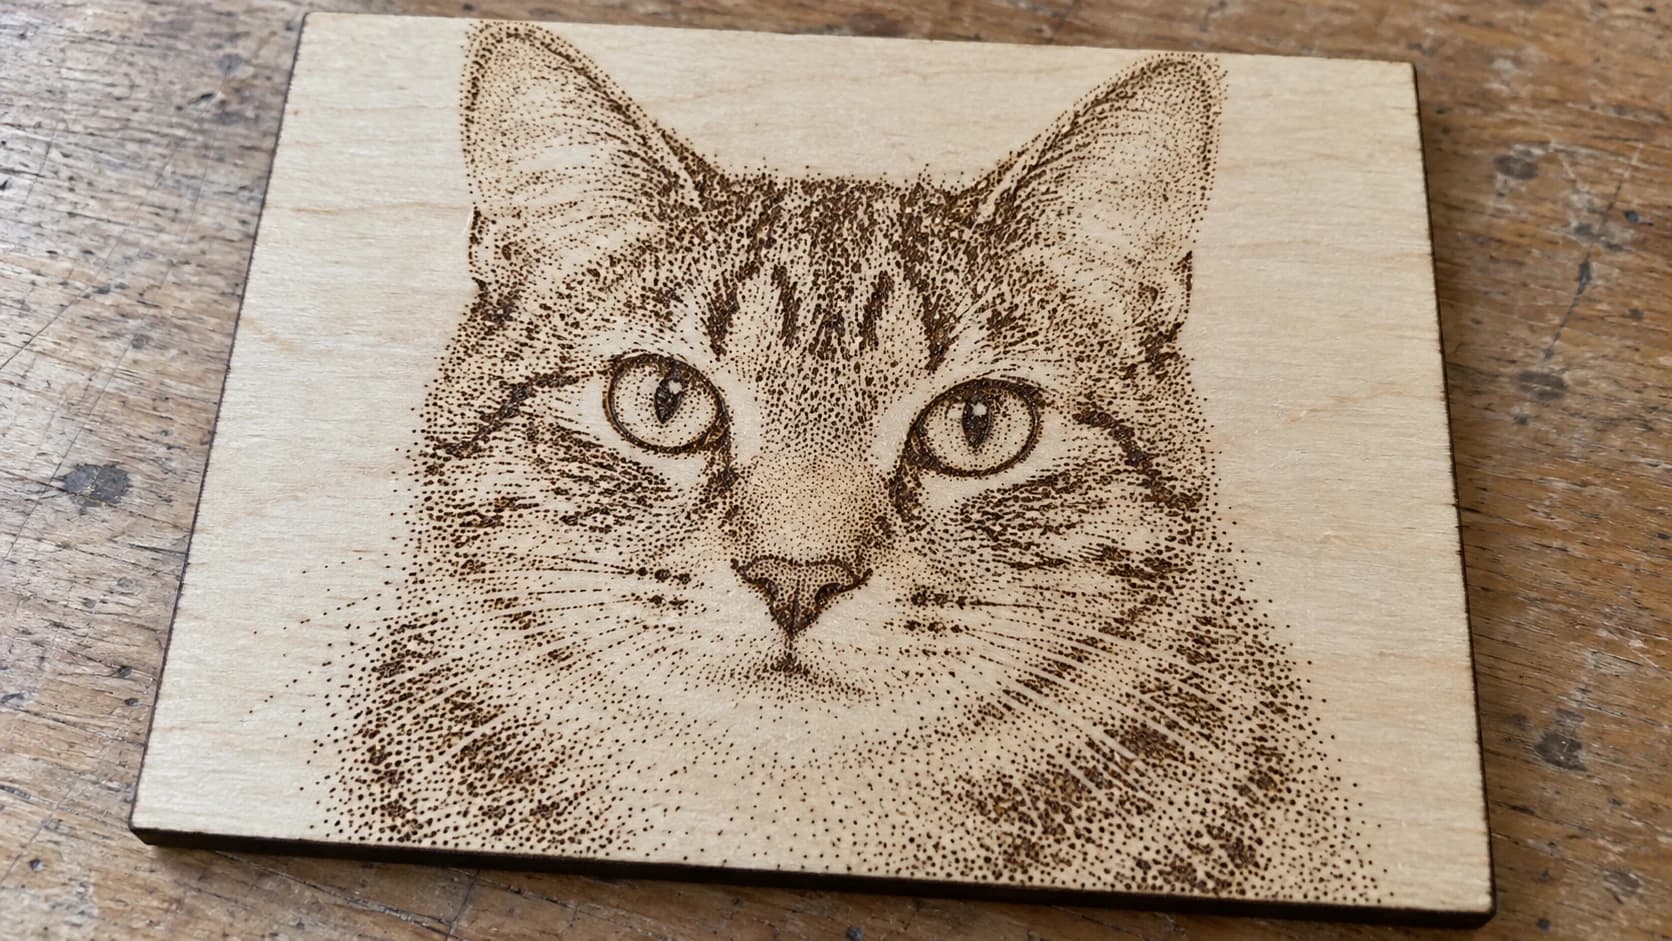
You send a photo to the laser, hit start, and what comes back is a muddy gray smear. The face is unrecognizable. The bright areas and dark areas blend into one flat blob. We have all been there, and the culprit is almost never the laser. It is the image. A laser burns a spot or it does not, so a photo full of smooth gray tones has to be translated into pure black and white dots first. That translation is called dithering, and doing it well is the difference between a portrait and a smudge.
DitherLab handles that translation. Upload a photo, pick a dithering style, and it converts your smooth tones into a pattern of dots the laser can actually reproduce. It exports at exact size, ready to engrave.
Why Photos Need Dithering
A laser engraves in dots. On most diode and CO2 setups, each spot is either burned or not burned. There is no built-in "50% gray."
A photograph, on the other hand, is nothing but gray values. To reproduce a gray area, you have to fake it with a pattern of black dots: more dots for darker areas, fewer for lighter ones. Stand back and your eye blends the dots into shades. That is dithering. It is the same trick newspapers used for a century to print photos with only black ink.
If you skip this step and send a raw grayscale photo, your laser software will dither it for you, and usually badly. Doing it yourself gives you control over the pattern, the contrast, and the final size.
PRINT. CUT. CARVE.
- Multiple formats (SVG, DXF, PNG)
- Machine-tested designs
- Commercial licenses
Sponsored by PrintCutCarve.com
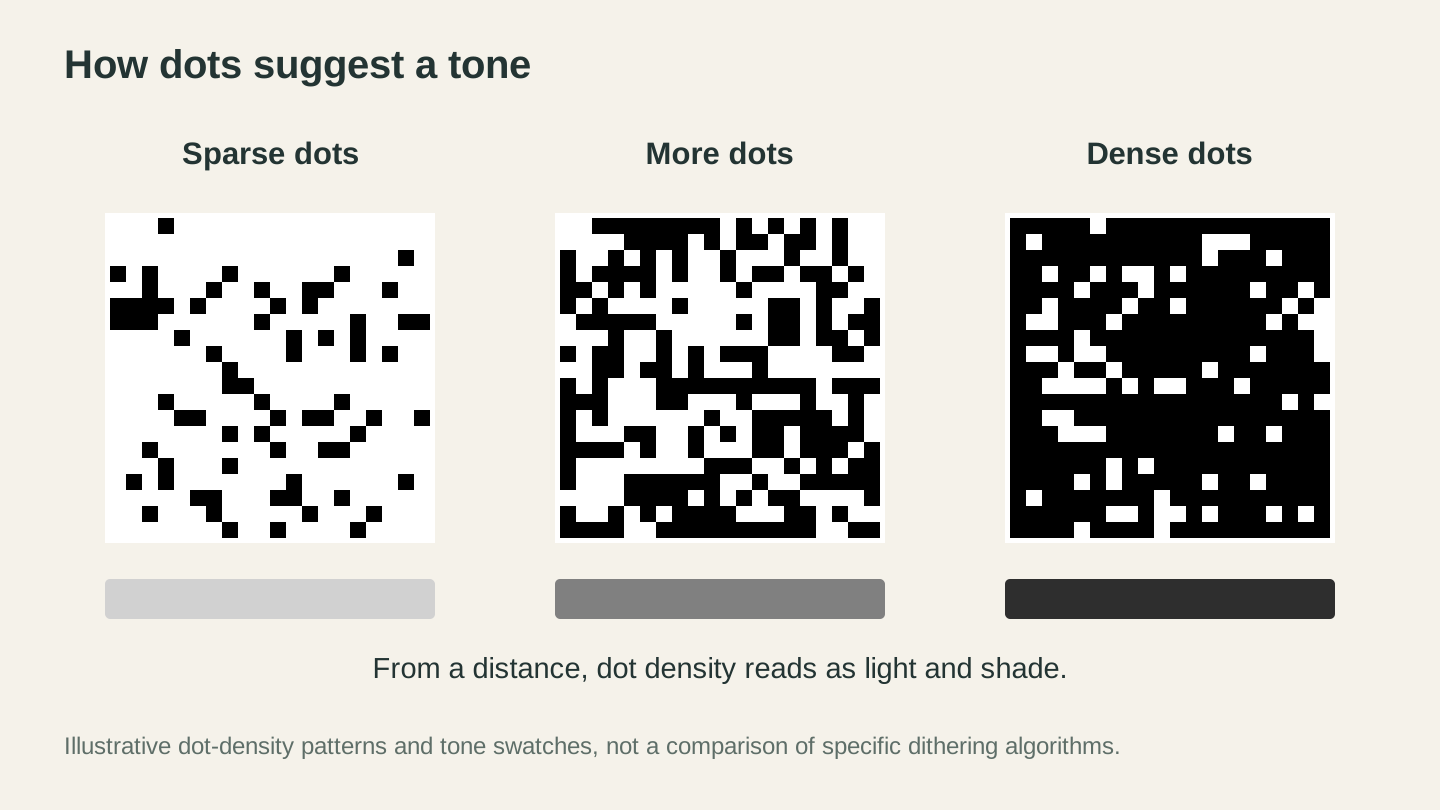
More marked pixels create a darker tone when viewed from a distance. These enlarged patterns illustrate density; they do not compare named dithering algorithms.
The Two Families of Dithering
DitherLab gives you a range of styles, and they fall into two camps that behave very differently.
| Family | Examples | Look | Best for |
|---|---|---|---|
| Diffusion | Floyd-Steinberg, Atkinson, Jarvis, Stucki, Sierra | Photographic, fine grain | Portraits, realistic photos |
| Ordered and halftone | Ordered (Bayer), halftone dots, newsprint, pattern screen | Visible retro pattern | Posters, signs, stylized art |
Diffusion styles scatter the error from each pixel into its neighbors, which produces a natural, photographic grain. Floyd-Steinberg is the workhorse everyone reaches for. Atkinson keeps more open white space, which looks great on wood. These engrave smoothly and read as real photos from a normal viewing distance.
Ordered and halftone styles lay down a regular, visible pattern. Halftone dots give you that classic comic-book or screen-print feel. Newsprint mimics old newspaper photos. These are a style choice, not a realism choice, and they shine on posters and bold stylized pieces.
DitherLab also includes some organic and pattern textures (things like plasma, pebbles, and pavers) for when you want an artistic surface rather than a literal photo.
Tip
Not sure which to pick? Start with Floyd-Steinberg for any photo of a person or pet. Switch to Atkinson if the result looks too dark on wood. Reach for a halftone style only when you actually want the pattern to show.
Fix the Photo Before You Dither
Dithering is unforgiving. It exposes every flaw in the source image, so a few seconds of prep pays off.
DitherLab has built-in brightness, contrast, gamma, and sharpen controls, and small changes here shift the entire texture. A common fix: bump contrast so the darks stay dark and the lights stay clean, then add a touch of sharpening so features hold their edges.
Two more prep tips:
- Bad lighting or a busy background will wreck the result. Run the photo through PixelPrep first to remove the background and get a clean subject, or upscale a small image so it has enough detail to dither.
- For slate, dark tile, or anodized aluminum, turn on the Invert option. On dark materials the laser lightens the surface, so you want white dots on black rather than the other way around. Our inverted photo on slate guide walks through this.
Get the Size and DPI Right
This is where dithering for laser differs from dithering for print. For a clean engrave, the image dots need to map one-to-one to your laser's dots. If they do not, your laser software resamples the image and the careful pattern turns back into mush.
In DitherLab:
- Set the physical width of your piece in millimeters or inches.
- Set the DPI to match your laser's dots per inch (or dots per millimeter).
- Export the PNG. It comes out at exact size, already dithered.
Now the pattern lands on your material at true scale with the dots intact.
Warning
In your laser software, engrave the dithered PNG in dot mode or pass-through, and turn off any built-in dithering or grayscale conversion. If the software re-dithers an already-dithered image, you get interference patterns and lost detail. You did the work once. Do not let the software redo it.
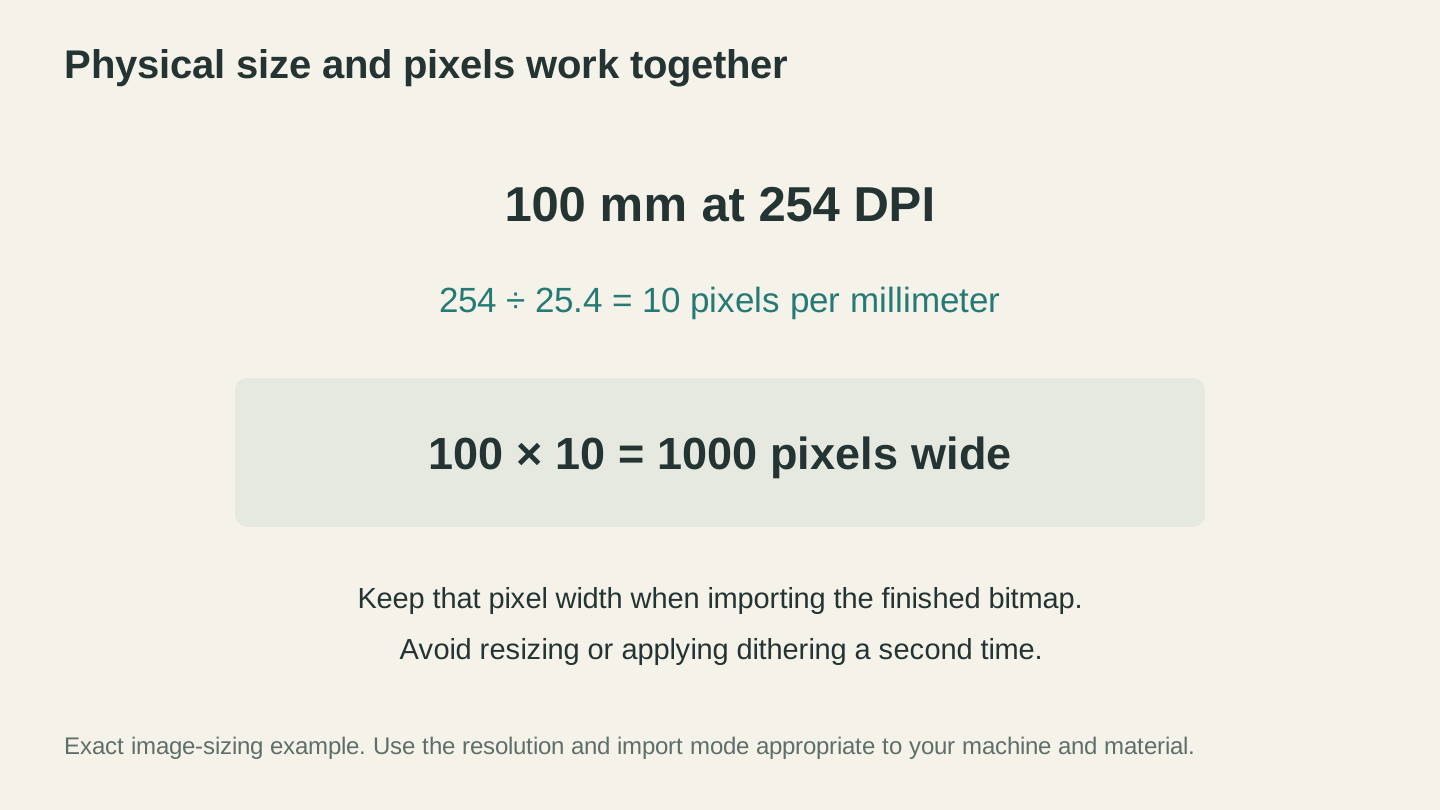
At 254 DPI there are 10 pixels per millimeter, so a 100 mm image is 1,000 pixels wide. Preserve that bitmap size when importing it into the engraving workflow.
PNG or SVG?
DitherLab exports two ways:
PNG is what you want for raster engraving. It is the exact-size dithered bitmap, ready to burn.
SVG (vector dots) exports the halftone dots as real vector shapes, crisp at any size. This is useful when you want to cut or engrave the dots as geometry, scale the design without quality loss, or bring the pattern into a vector workflow.
For most photo engraving, reach for the PNG. For stylized halftone art you plan to resize or combine with other vector work, the SVG is the better pick.
A Quick Workflow
Here is a reliable start-to-finish routine for a wood photo engrave:
- Clean up the subject in PixelPrep if the background is busy.
- Open DitherLab, upload the photo, and choose Floyd-Steinberg or Atkinson.
- Nudge contrast up and add light sharpening until features read clearly.
- Set the physical width and your laser's DPI.
- Export the PNG and engrave in dot mode.
If you are new to photo work on the laser, our beginner's guide to laser engraving and the common mistakes guide cover the fundamentals that keep photos from going wrong.
Go Dither a Photo
Open DitherLab and drop in a photo. It is free and unlimited, so try Floyd-Steinberg against a halftone style on the same image and watch how different they look. Once you see a face come through cleanly on a test piece of wood, you will never send a raw grayscale photo to the laser again.
Happy making.
Related Tools
Ready to try these tools?
Sign up free, no credit card required. Free tools available immediately.
Start Free